
Ok, so I'm going to make a little write up on how to easily install ADB and fastboot on a Mac. It's actually quite simple, and plus you don't have to worry about drivers like in Windows.
Instructions
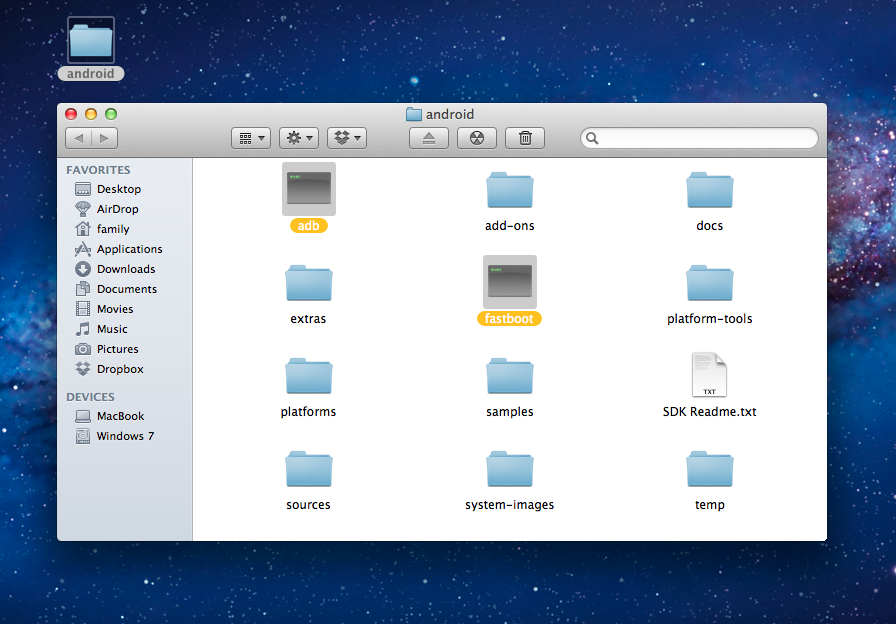
First, make a folder named "android" (no quotes of course
 )
You can place it anywhere on your hard drive, it doesn't really matter.
Put it somewhere you'll easily remember, because you're going to be
using it a LOT. I placed mine on my desktop.
)
You can place it anywhere on your hard drive, it doesn't really matter.
Put it somewhere you'll easily remember, because you're going to be
using it a LOT. I placed mine on my desktop.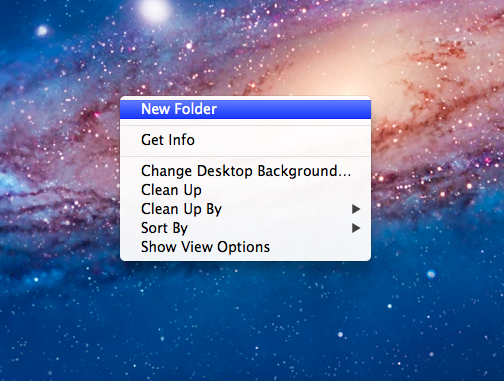
Next, you'll want to download the android SDK from Here. (you won't need to install Java first like you would on a Windows PC, though I would recommend it anyway)
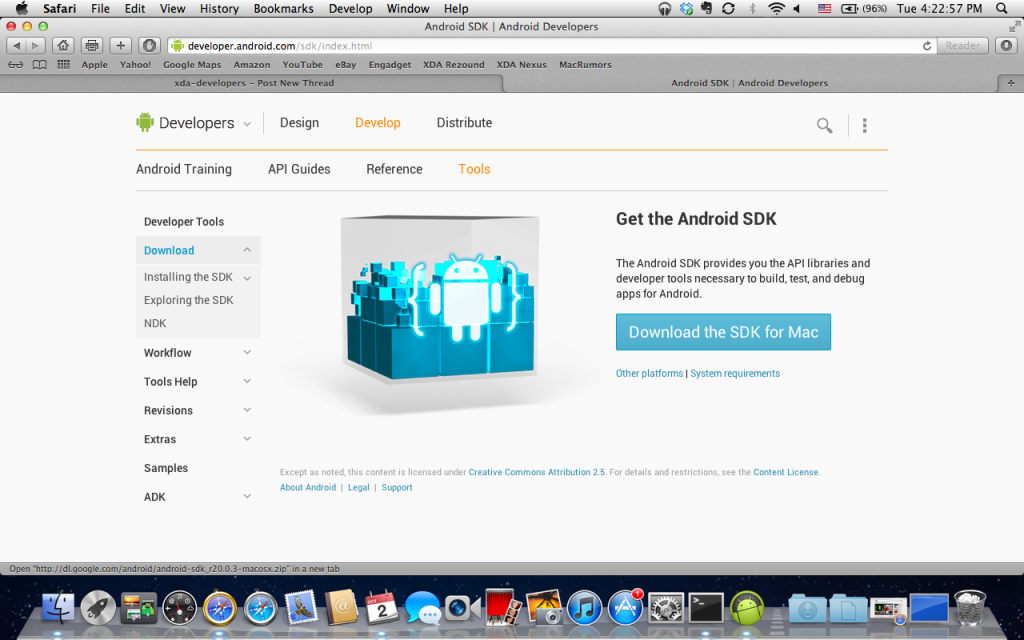
When the SDK finishes downloading, Unzip it and the contents of the "android-sdk-mac_x86" folder into your android folder.
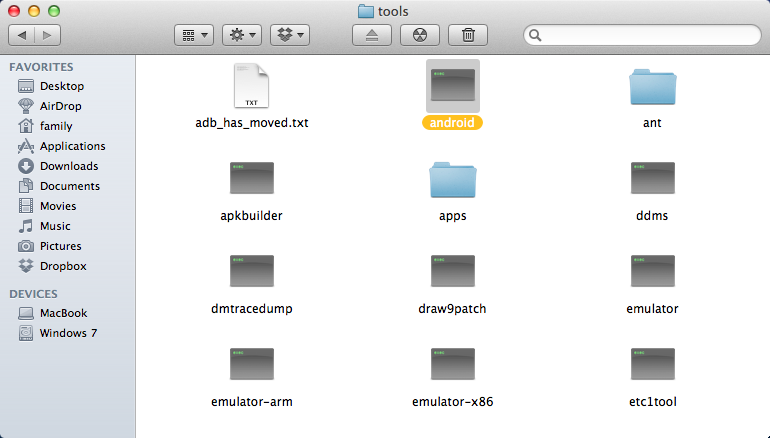
Once you have done that, open your android folder. Go into the tools folder inside of it. Double click on the file called "android" (possibly called android sdk) This file is a UNIX executable and will open within a Terminal window.
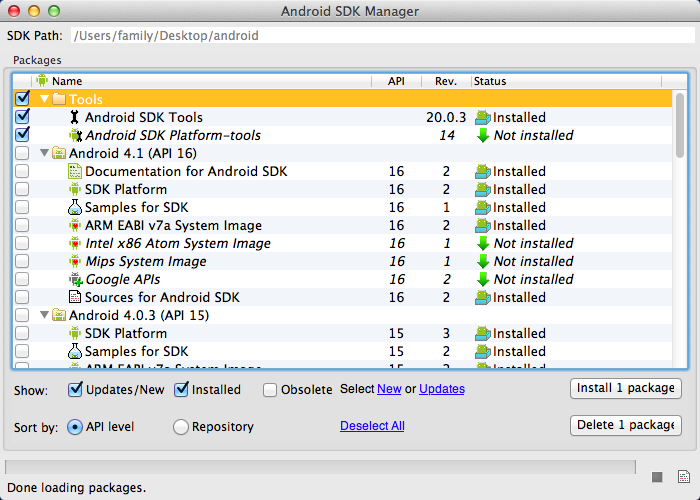
When it finishes opening, check the folder called tools. Make sure both "Android SDK Tools" and "Android SDK Platform-tools" are selected within the tools folder. Click install and wait for them to download.
When they finish downloading, go into the platform-tools folder inside your android folder, then copy adb and fastboot and paste them into the root of your android folder.
Now that you have adb and fastboot installed, we're going to want to test them to make sure they work.
Go ahead and plug in your android device at this time. Make sure android debugging is enabled in settings. Go into Settings > Apps > Developer and check it there (for Gingerbread 2.3 and lower) or go into Settings > Developer Options and check it there for Ice Cream Sandwich or Jellybean. As of now, there are two ways to access adb and fastboot.
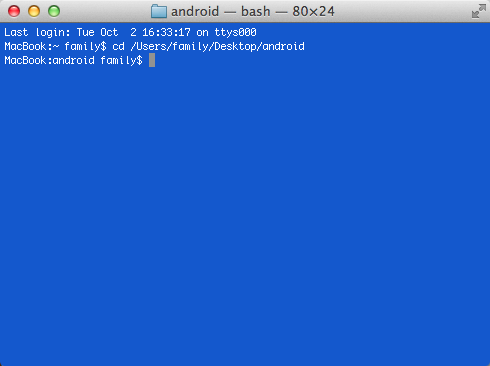
Open a Terminal window (look in Applications > Utilities if you can't find it). Type "cd" followed by the path you saved your android folder to (I'm going to use the Desktop for this demonstration) it should look like this
Code:
cd /Users/<yourusername>/Desktop/android
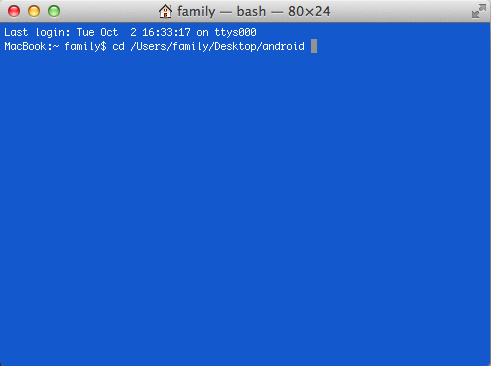
Press enter.
Now you need to actually execute an adb or fastboot command. To do this, you'll need to type "./adb (or fastboot) <command>" For this tutorial, we will use "ADB devices" since it doesn't actually do anything to the phone. (we won't use fastboot since it requires rebooting to the boot loader which is different for every device)
In the same terminal window as before type the following:
Code:
./adb devices
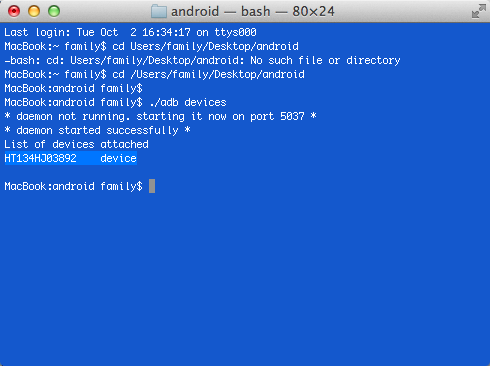
(if it says * daemon not running. starting it now on port 5037 *
* daemon started successfully * that is perfectly normal)
Now, at this moment, ADB and Fastboot are both completely useable. However, it's very annoying to have to CD into the directory and use ./ in front of every terminal command. I'll show you how to add it to your path so you don't have to do any of that.
Open a new Terminal window and type
Code:
nano ~/.bash_profile
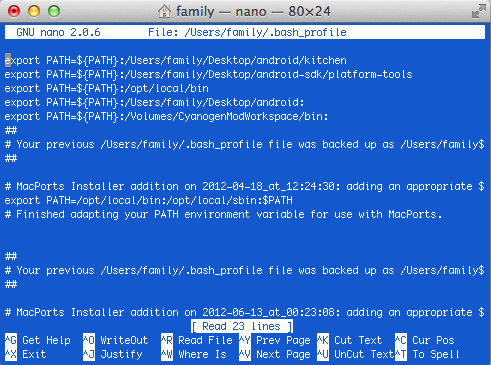
(Yours will probably be blank, because I've added a lot of stuff to mine over the years)
Add a line to it that contains the path to your android folder. (again, I'm using Desktop) It should look like this
Code:
export PATH=${PATH}:/Users/<yourusername>/Desktop/android

Once you have added that, press CTRL+X to exit, then Y to confirm the save then press enter. It will close the nano editor. You can close the Terminal window now.
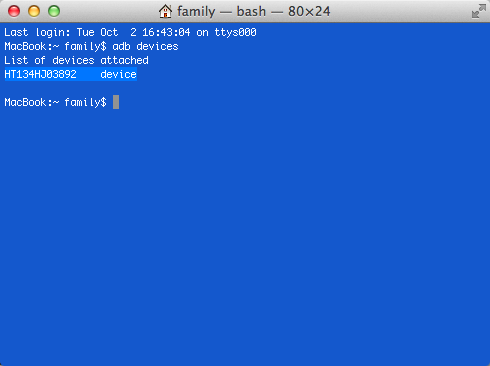
Now we need to verify that it works. Open a new Terminal window and type
Code:
adb devices
No comments:
Post a Comment